
Outdoor marijuana cultivation is a practice that attracts many fans and cannabis experts for their unique characteristics and benefits. This modality allows plants to grow in a natural environment, where they can fully take advantage of sunlight, which is essential for their development and flowering. When planting exterior marijuana, an opportunity is created to cultivate in a wider space, which often results in larger and robust plants compared to those that grow indoors.
One of the most important aspects to consider is "When to plant exterior marijuana", since the success of the crop depends largely on choosing the appropriate time of the year, which varies according to geography and local climate. Marijuana sowing outdoors usually coincides with the station in which daylight hours begin to increase, usually in spring or early summer.
Among the benefits of Outdoor marijuana culture includes cost reduction, since artificial lighting equipment is not required, and less environmental impact. In addition, many times it is observed that plants develop a richer flavor and aroma profile, thanks to exposure to a natural and varied environment. The tricks to plant marijuana abroad are fundamental to maximize these benefits and ensure a successful harvest.

Step 1: Choice of the variety of Seeds Adequate
The choice of the correct variety of marijuana for your exterior cultivation is crucial and depends largely on the climate and the environmental conditions of your region. Each variety has its own needs and adapts better to certain types of weather and soil. For example, some varieties prefer warmer and drier climates, while others thrive in cooler and more humid conditions.
Adaptation to the weather and environment
- Warm climates: Varieties that support heat and intense sun exposure are ideal for warmer climates. These plants are usually more resistant to drought and need less irrigation.
- Cold climates: In colder regions, it is important to choose varieties that can withstand low temperatures and have a shorter flowering cycle to avoid early frost damage.
Differences between Indica, sativa and hybrids
- Indica: Indian varieties are usually more robust and compact, with a shorter flowering cycle. They are suitable for colder climates or for areas where summers are brief.
- Sativa: Sativa plants tend to be higher and more slender, with a longer flowering cycle. They prefer warmer climates and are ideal for regions with long summers.
- Hybrids: Hybrid varieties combine characteristics of indications and sativas. Cultivators have developed hybrids to adapt to a variety of climatic conditions and to offer a range of effects and flavors.
It is important to investigate and consider the specific characteristics of each variety before deciding which one to plant. Some key questions to consider include: How long does it take to bloom? Is it resistant to pests and common diseases in your area? What kind of care do you require?

Step 2: Cultivation site selection
The choice of the right place for how to plant outer marijuana seeds is a critical step that can significantly influence the health and productivity of your plants. There are several factors to consider to ensure that your plants receive the optimal conditions for their growth.
- Sun exposure: Marijuana plants require a significant amount of direct sunlight to grow properly, ideally between 6 to 8 hours of direct sunlight per day. Find a place that offers sufficient sun exposure, avoiding areas with excessive shadow.
- Protection and privacy: It is important to choose a site that offers some privacy and protection against indiscreet looks, respecting legality and discretion. In addition, it considers protection against strong winds and heavy rains, which can damage plants. A natural or artificial barrier that mitigates these elements can be very beneficial.
- Soil and drainage quality: A fertile and well drained soil is essential. The Earth must be rich in nutrients and with a good drain to avoid waterlogging, which can lead to problems of roots and diseases. If your garden floor is not ideal, you can consider the use of pots or large containers to better control soil quality.
- Space and disposition: Make sure there is enough space between plants to allow proper growth and good air circulation. This reduces the risk of diseases and pests. Site orientation is also important. In the northern hemisphere, an orientation towards the south maximizes sun exposure, while in the southern hemisphere, a north orientation is preferable.
- Access to water: Having easy access to water will facilitate regular irrigation of your plants. Consider the proximity of a water source to simplify maintenance.
- Security: Finally, security is an important aspect. In some areas, it may be necessary to protect wild animals or pets, using fences or protection structures.
Step 3: Soil preparation
A rich and fertile soil is the basis for a successful outdoor marijuana crop. Soil preparation is a crucial step that ensures that your plants have the necessary nutrients for healthy growth. Here I present some tips and options for soil preparation:
- Soil analysis: Before planting, use a pH meter To perform a soil analysis. This will give you a clear idea of the pH levels and the nutrients present. Ideally, marijuana soil must have a pH between 6.0 and 7.0.
- Soil enrichment: If the soil is poor in nutrients, you can enrich it by adding organic compost, Lombriz humus, or very broken manure. These materials improve soil structure and provide essential nutrients. The incorporation of Perlita either Vermiculite It can improve soil drainage and aeration, especially if it is very clay or compact.
- Fertilizers for marijuana: You can opt for organic fertilizers such as bat guano, bone flour, fishmeal or fish emulsions, which are rich in nitrogen, phosphorus and potassium, the main nutrients that marijuana needs. Inform you about which is the best fertilizer for cannabis at each growth stage, For example, in the vegetative growth phase, more nitrogen is needed, while more phosphorus and potassium are required in the flowering phase.
- Soil improvers: For very acidic or alkaline soils, you can adjust the pH using dolomitic or sulfur calm respectively. Soil conditioners, such as mob, can help retain moisture in sandy soils.
- Preparation and mixing: The ground works to a depth of at least 30 cm to make sure it is loose and aerated. This allows a good development of roots. If you decide to use containers for your cultivation, select a mixture of land suitable for cannabis, which is often already enriched with the necessary nutrients.
- Keeping healthy soil: Throughout the crop cycle, it is important to continue monitoring the soil and adjust the nutrients as necessary. The mulching mulching can be useful for maintaining soil moisture and suppressing weed growth.

Step 4: Germination
Germination is the first crucial step in the cultivation of your marijuana plants. There are several effective methods to germinate marijuana seeds, each with their own advantages. Here I present some of the most popular methods:
Towel paper method
- Place the seeds between two layers of paper wet towel and then place them inside a plate or container.
- Keep the paper wet towel and in a warm place, avoiding direct sunlight.
- The seeds generally begin to germinate in 24 to 72 hours.
Direct germination on land
- Plant the seeds directly on the ground or in pots, at a depth of approximately 1-2 cm.
- Keep the soil wet but not saturated.
- This option prevents transplant stress, but it can be a bit slower.
Use of germination cubes
- Germination cubes, such as Jiffy Pellets or the Rockwool CubesThey are prepared means that facilitate germination.
- Simply insert the seed into the cube and keep it wet.
- Once the seed has germinated, you can plant the cube directly on the ground or in a pot, reducing the transplant stress.
In water
- Dip the seeds in a glass of warm water (not hot) and leave them in a dark and warm place.
- The seeds should germinate in 24-48 hours.
- Once you see that the root emerges, place them on the ground or in a germination cube.
Tips for germination
- Keep the seeds in a warm environment, ideally between 20-25 ° C.
- Avoid over-hydration. The medium must be wet, but not soaked.
- Patience is key. Some seeds may take a little longer to germinate.
- Once the seed has germinated and the root has emerged, it is important to plant it carefully to avoid damaging the root.
Step 5: Plantation
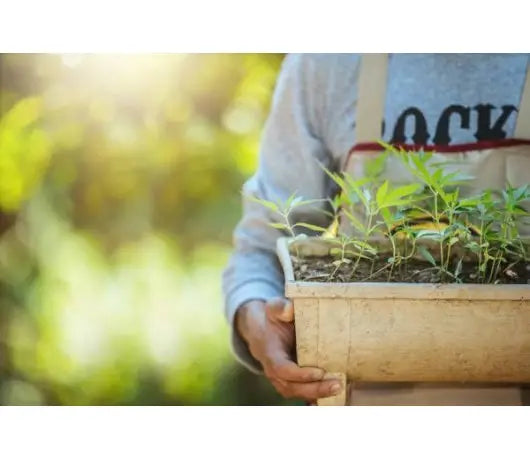
Once your marijuana seeds have germinated successfully, the next step is to plant them outdoors. Here I present a step -by -step guide to ensure a successful transplant and a good start for your plants:
Choice of the right moment
- It is essential to plant your seedlings abroad after all risk of frost has passed. In most climates, this is usually Finals of spring or early summer.
- Look at the weather forecast to avoid transplanting in extremely low or high temperatures days.
PLANTIS ACLIMATIVE
- Before planting them abroad, it is important acclimatize seedlings to the outer environment To reduce transplant shock. This is known as "hardening."
- Start exposing the outdoor seedlings for a few hours a day, gradually increasing time for a week.
Plantation site preparation
- Make sure the ground is well prepared, as described in step 3.
- Choose a place with good sun exposure and wind protection.
Excavation of the holes
- Cava holes that are slightly larger than the size of the germination cube or the pot where the seedlings were developed.
- The space between plants should be sufficient to allow their growth and air circulation. Generally, it is recommended to leave at least 1 meter of space between each plant.
Seedling transplant
- Slightly water the seedlings before transplanting to minimize stress.
- Be careful, place each seedling in its hole, making sure that the root is not folded or compressed.
- Fill the hole with loose soil and press slightly around the base of the plant to remove airbags.
Initial irrigation
- After planting, water the seedlings generously to help settle the earth and provide the necessary hydration for a good start.
- Avoid watering in excess, since the soil too humid can cause roots problems.
Post-Plantation care
- During the first weeks after planting, monitor your plants regularly to ensure that they are adapting well to the outside environment.
- Keep a regular irrigation program, adjusting according to the climatic conditions and the needs of your plants.

Step 6: Irrigation and Nutrition
Adequate irrigation and nutrition are fundamental for the healthy development of outdoor marijuana plants. Here I offer you some guidelines on the frequency and quantity of irrigation, as well as information about essential nutrients.
Frequency and amount of irrigation
- Seedling phase: Seedlings require careful irrigation to avoid excess water. Water slightly but frequently, keeping the soil wet but not soaked.
- Vegetative growth phase: As the plant grows, its water needs increase. Water deeply but less frequently to encourage a strong root system. A good indicator is soil moisture. Water when the first centimeters of the ground are dry to the touch.
- Flowering phase: During flowering, plants may require more water due to its larger size and the intensity of the sun. However, it is important to avoid excessive irrigation, which can cause root problems and fungi.
- Irrigation techniques: It uses irrigation techniques that direct water to the roots, such as drip irrigation or a governing with a soft flow, to avoid wetting the foliage unnecessarily.
Essential nutrients
You have to understand that the needs of the plant change in each growth case and it is necessary to know which is the best fertilizer for cannabis at each growth stage:
- Nitrogen (n): Essential during the vegetative growth phase for the development of healthy leaves and stems. A nitrogen deficiency is manifested in pale or yellowish leaves.
- Phosphorus (P): Crucial for the flowering phase, phosphorus helps in the development of strong roots and healthy flowers. A deficiency can delay growth or reduce flower size.
- Potassium (k): Important in all phases, potassium contributes to the general function of the plant and disease resistance. Deficiency symptoms include leaves with brown or burned edges.
- Micronutrients: Elements such as calcium, magnesium, iron and other micronutrients are also important for the balanced development of the plant.
Nutrient supplementation
Use specific fertilizers for cannabis that conforms to the needs of each growth stage.
Follow the manufacturer's instructions to avoid supercharging, which can be as harmful as the lack of nutrients.
Step 7: Maintenance and Care
Proper maintenance and constant care are essential to ensure a healthy and productive crop of marijuana outdoors. Here I explain some important techniques for the care of plants, as well as advice to prevent and treat common problems such as pests and diseases.
Plant care techniques
- Poda in marijuana: Pruning helps control plant growth and improve air circulation, which reduces the risk of diseases. Eliminates dead or yellowish leaves and lower shoots that receive little light. During the vegetative phase, you can prune the plants to encourage more dense growth.
- Plant training: Techniques such as "Low Stress Training"(LST) involve folding and binding the branches to expose more parts of the plant in light, thus increasing production."Apical Poda or Topping"(Cut the tip of the plant) and"Fiming"(Pinch upper growth) are techniques that encourage more shrub growth.
- Climate control: In extreme climates, it may be necessary to provide additional shadow or frost protection to protect your plants.
Prevention and treatment of Pests and diseases in marijuana
- Pest prevention: Maintaining a clean and tidy culture environment is essential to prevent pests and diseases. Use physical meshes or barriers to protect insects and animals. Cultivating companion plants that repel certain pests can be an effective strategy.
- Identification and treatment of pests: Regularly inspect your plants in search of pest signs, such as mites, aphids or larvae. Use organic insecticides or natural solutions, such as insecticide soap or Neem oil, to treat infestations.
- Disease management: Keep a good air circulation around plants to prevent fungi and mold. If you detect signs of disease (such as spots on the leaves or rot), identify the cause and apply proper treatment, which may include fungicides or adjustments in irrigation and nutrition.
- Constant surveillance: Monitor your plants regularly will allow you to quickly detect and address any problem before it becomes a major problem.
Step 8: Harvest
The harvest is the most anticipated moment in the marijuana culture cycle. Knowing when and how to harvest is crucial to obtain optimal quality. Here I explain how to identify the right time for harvest and the appropriate techniques to cut and collect your plants.
Identification of the right time for harvest
- Observation of trichomes: Trichomas are small resinous glands in the butnabinoids contain. Its appearance changes throughout the maturation of the plant and is a key indicator to determine the time of harvest. Use a magnifying glass or a hand microscope to observe the trichomes. When most of them change clear to a milky or amber color, it is a good time to harvest.
- State of the pistils: The pistils are the small hairs that stand out from the buds. At first they are white, but they turn orange or brown as the ripe plant. A sign that it is time to harvest is when around 70-90% of the pistils have changed color and have shrugged towards the buds.
- Plant growth evaluation: It is also important to observe the plant as a whole. If the growth of new pistils has stopped and the buds are swollen and compact, it can be a good maturity indicator.
CUTTING AND COLLECTION TECHNIQUES
- Necessary tools: Prepare with pruning scissors sharp and clean or manicure scissors for a precise cut.
- COGOLLOS CUTTING: Cut the cogollos of the plant carefully. You can cut entire branches or individual buds. Handle the flowers carefully to avoid damaging trichomes and lose resin.
- Manicure: After cutting the buds, it performs a manicure, which implies removing the leftover leaves that do not contain trichomes, known as "sugar leaves." This improves the appearance and quality of the buds. Manicure can be done before or after drying, although doing so fresh is usually easier.
The harvest at the right time is essential to ensure the maximum power and the best taste profile of your buds. Taking your time to properly harvest and process your plants can make a big difference in the final quality of the product.

Step 9: Drying and Cured
Drying and cure are crucial stages in the marijuana culture process, since they significantly influence the quality and power of the final product. Here I show you how to perform these processes correctly.
Exterior marijuana drying process
- Drying preparation: After harvesting and manufacturing the buttles, shine them face down in a dark, fresh place and with good air circulation. The ideal temperature is between 18-22 ° C (65-70 ° F) with a relative humidity of 45-55%.
- Drying duration: The drying process usually lasts between 7 to 14 days. Do not hurry this process, since a slow and uniform drying improves the quality of the final product.
- Drying verification: You will know that the buds are dry when the stems break instead of bending and the buds feel dry to the touch.
Curning process
- Storage for Cure: Once dry, place the buds in hermetic glass jars, filling them up to 75% to allow air circulation.
- Ventilation: During the first weeks, open the jars once a day for a few minutes to allow air renewal (known as "burping"). This not only helps eliminate the remaining humidity, but also allows gases such as chloroform and ammonia to dissipate.
- Duration of the cure: Cure can last from two weeks to several months. The longer the buds, the better the quality of the flavor and softness of smoke will be.
Importance of drying and curing
- Improvement of flavor and aroma: The right curing breaks down the chlorophyll in the buds, eliminating the roughness and improving the flavor and aroma.
- Maximum power: During the curing, cannabinoids continue to develop, which can increase the power of the butt.
- Mold prevention and bacteria: A proper drying and curing prevents the growth of mold and bacteria, ensuring a safe product for consumption.