Humidity in propagation is the key for a seed to sprout strongly and for a cutting to survive until it grows roots. The problem is that, in propagators and mini-greenhouses, humidity rises and falls very quickly: continuous excess triggers molds and rotting, and a lack causes young tissues to dehydrate within hours. Here is a clear method to stabilize it safely.
Why humidity rules in germination and cloning
In propagation, you work with “tender” tissues with little ability to regulate their water balance. If the environment dries out, the plant loses water faster than it can replace it; if the environment is saturated without air exchange, fungi thrive easily.
-
Seeds: need a humid environment to hydrate and activate germination, but cannot withstand prolonged waterlogging.
-
Cuttings: since they do not have functional roots at first, they lose water through the leaves and depend on high ambient humidity to avoid collapsing.
The good news is you don’t need “perfect numbers”: you need stability. A microclimate with little fluctuation, controlled ventilation, and a moist (not soaked) substrate reduces almost all typical failures.
Recommended ranges: humidity and temperature by phase
These ranges serve as a reference to adjust the propagator without playing roulette. Use them along with a reliable meter and, above all, observe the leaves and substrate.
| Phase | Target relative humidity | Target temperature | Sign you’re on track |
|---|---|---|---|
| Germination (day 0-3) | 75-90% | 22-25°C | The medium is moist and airy, without puddles |
| Seedling (until cotyledons open) | 65-80% | 22-25°C | Firm leaves, without constant “shine” of water |
| Cloning (day 0-5) | 85-95% | 22-25°C | Turgid leaves, no dry edges |
| Cloning (day 6-until roots) | 70-85% | 22-25°C | They start “drinking” less through the leaf |
| Acclimatization before transplanting | 55-70% | 22-25°C | Stable leaves without dome, continuous growth |
On the Grow Industry blog, for cuttings, it is already recommended to start with humidity above 90% and then gradually lower it; as well as maintaining a constant temperature around 22-25°C. If you want to see the complete cloning process step by step, here is this guide: how to make marijuana cuttings step by step.
The “3 levers” method to stabilize humidity
To control humidity without rot or mold, think of three levers. Only adjust one at a time, and wait 20-30 minutes to see the effect inside the propagator.
1) Controlled ventilation (the most powerful lever)
The typical mistake is to leave the dome closed “to keep it humid” and not open it for days. That creates a saturated microclimate, with no air exchange, perfect for fungi. Better:
-
Day 0-2: dome almost closed, but open the windows/vents if it has them and do 1-2 quick air exchanges per day.
-
Day 3-5: open the windows a bit more and reduce misting if the substrate is stable.
-
Once you see roots or a settled seedling: open the dome more and more to progressively lower humidity.
If you use a propagator with top vents, it will be easier to adjust. For example, the PVC Propagator 56x31x22cm allows you to control humidity with its ventilation windows.
2) Substrate moisture (moist, not soaked)
In propagation, most “rotting” doesn’t come from high ambient humidity, but from a medium that’s too wet, cold, or lacking oxygen. Simple rules:
- If the medium drips when you squeeze it, it’s too wet.
- If the medium pulls away from the edge or leaves “dust” on the surface, it’s too dry.
- Water sparingly and with intention: better small amounts and observe than “watering again by routine.”
If you work with cells or trays, you want all of them to have a similar moisture level so the propagator stays stable. The Plugins Pro Trays are designed to germinate seeds and root cuttings in an organized, easy-to-maintain format.
3) Stable temperature (so humidity doesn’t spike)
Relative humidity depends a lot on temperature: when the temperature drops inside the dome, relative humidity spikes and condensation appears; when it rises, it plummets and everything dries out. That’s why, more than “raising humidity,” what you often need is to stabilize the temperature.
- Practical target: constant 22-25°C.
- Avoid placing the propagator on cold floors or near windows.
- If your room is cold, a heat mat under the propagator gives you stability without overheating the air.
If you grow in winter or in an indoor setup that gets cold at night, a useful option is the 30W Heating Mat with VDL Controller.
Quick setup of a propagation area that won’t get out of control
If the propagator is in an “unstable” room (drafts, radiators, windows, sharp day/night changes), it will be hard to maintain the microclimate. The most practical thing is to create a small, controlled propagation area:
-
Dedicated space: a specific propagation cabinet reduces drafts and allows you to maintain constant conditions.
-
Soft light: enough to keep seedlings and cuttings alive, avoiding excessive heat.
-
Organization: trays, labels, and clean tools so you don’t “bring problems” into the dome.
If you are looking for a compact space designed for this stage, take a look at the Probox Propagator Garden Highpro Cabinet, designed for germination and rooting.
Condensation: when it is normal and when it is a warning
Seeing drops on the dome is not always “bad.” The important thing is the pattern:
-
Normal: light condensation in the morning or after misting, which disappears when ventilated.
-
Warning: walls always soaked, drops falling onto the substrate, musty smell, greenish or cottony surface.
If you are in “warning” mode, prioritize ventilation: open windows, lift the dome a few millimeters or ventilate 2-3 times a day. Then check watering and temperature.
Hygiene: the silent factor against mold and rot
You may have good ranges, but if the environment is dirty, mold appears sooner. In propagation, hygiene is not “obsession”: it is smart prevention.
-
Tools: clean scissors or scalpel, and quick cutting (for cuttings) to reduce stress.
-
Propagator: clean dome and tray between batches, especially if there was mold in the previous batch.
-
Water: avoid sprayers with “old” water or residues; they become breeding grounds.
Also, do not mix suspicious plants with new material: in propagation, an infection spreads quickly because everything is close and “closed.”
How to measure correctly without obsessing
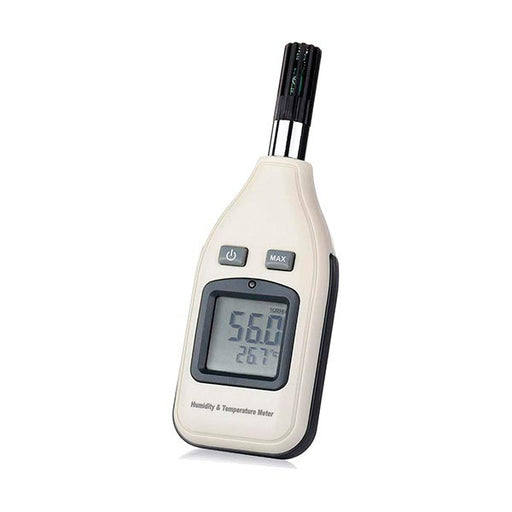
If you don’t measure, you adjust blindly. If you measure poorly, same thing. Ideally, use a thermo-hygrometer inside the propagator at leaf height, not stuck to the plastic. At Grow Industry you have a practical example: Large Screen Thermo-hygrometer.
Quick tips:
- Place the sensor where the plants “breathe,” not in a corner.
- Avoid getting direct spray water on it.
- Record 2-3 readings a day during the first week. That way you will see the pattern.
Misting: yes, but with judgment
Misting can save freshly cut cuttings, but it can also create a constant water film that triggers mold. The key is to use misting as a temporary tool:
-
Cuttings days 0-2: gently mist the dome walls (more than the leaves) if you see humidity dropping too much.
-
Cuttings day 3 onward: reduce misting and let the substrate set the pace.
-
Seedlings: avoid repeatedly wetting leaves; prioritize ambient humidity and light watering of the medium.
If you mist leaves, do it with a fine spray and under soft lights, so they don’t stay wet for hours. If you constantly see a shine, you are providing more water than you need.
Lowering humidity without stress: proper acclimatization
The goal is not to keep the dome closed “until transplant,” but to prepare the plant for the real environment. The transition should be gradual:
- For cuttings, start opening vents a little more each day from the first week (depending on response).
- For seedlings, lower it gently once the cotyledons have opened and you see stable growth.
- If they fall when opening, go back a step and repeat the next day with less opening.
When it's time to transplant, you want them to be “ready” and without shock. You can complement with this guide: when should I transplant my marijuana plant.
Typical mistakes that end up in mold or rot
Closed propagator without air renewal
A dome closed for days means stagnant air. Solution: scheduled ventilation (manual or with a daily routine) and condensation control.
Waterlogging the medium “just in case”
In propagation, excess water takes a long time to leave. If in doubt, wait and observe: most water failures come from “one watering too many”.
Excessive light
Too much intensity increases transpiration and stress. For propagation, a soft light is usually enough; the goal is to keep the tissue alive and stable, not to “make it grow like crazy” from day 1.
Low temperature in the substrate
When the medium is cold, the water stays, oxygen drops, and root problems appear. If you notice the propagator is “warm” on top but the substrate is cold to the touch, fix it with insulation or a heat mat.
2-minute daily checklist
- Is there permanent condensation and a musty smell? Ventilate.
- Is the substrate moist but not waterlogged? Maintain.
- Turgid or drooping leaves? Adjust humidity/ventilation before watering.
- Temperature outside 22-25°C? Correct location or base heat.
- Do you see white/greenish spots? Reduce saturation and improve aeration.
Step-by-step routine for germination in a propagator
This routine works very well if you want stability without complications:
- Moisten the medium and let it drain. It should be moist, not dripping.
- Place seeds and close the propagator.
- Maintain stable 22-25°C (if it's cold, use bottom heat).
- Ventilate quickly once a day to renew the air.
- When cotyledons emerge and open, lower humidity by gradually opening vents.
If you are also dealing with low temperatures indoors, this related reading may help: Germination indoors with cold: ideal temperature and humidity to avoid fungi and failures.
Step-by-step routine for cloning without molds
In cloning, the focus is to keep leaves alive without saturating the medium. A simple guideline:
- Prepare the propagator and medium before cutting.
- Place the cuttings in their medium and close the dome.
- During the first days, aim for high humidity and stable temperature.
- Ventilate 1-2 times a day and observe condensation.
- As days go by, gradually lower humidity to “harden” the cutting before transplanting.
To support rooting, you can use a stimulator designed for this phase, such as Clonex PRO Start Growth Technology, combined with a stable environment.
Quick diagnostic table: symptom, cause and adjustment
| Symptom | Most likely cause | Recommended adjustment |
|---|---|---|
| Superficial mold (white/greenish) on the medium | Excess moisture and stagnant air | Ventilate more, reduce misting and let the surface dry slightly |
| Cuttings wilt within hours | Insufficient humidity or excessive heat/light | Close the dome more, lower the light and increase humidity without waterlogging |
| Soft/darkened stems | Waterlogged medium + low temperature | Reduce watering, improve drainage and stabilize medium temperature |
| Seedlings "leggy" and weak | Lack of light (or light too far away) | Slightly increase intensity or bring the light closer without raising temperature excessively |
| Leaves with dry edges | Low humidity and/or excessive ventilation | Close a bit more and gradually increase humidity |
Frequently Asked Questions
What humidity is best so a cutting doesn't dry out?
At first, high humidity is best (very close to 90% in the first days) to reduce transpiration. Afterwards, it's important to lower it gradually so the cutting adapts to the normal environment without stress.
When should I open the propagator to ventilate?
Ideally, do short daily air renewals from the start. If you see permanent condensation, increase the frequency or open the vents more. As soon as there are roots or the seedling is established, open more and more to lower humidity.
Is it bad if there are drops on the lid?
Not necessarily. It's normal to see some punctual condensation, especially at the beginning. It's a warning sign if the lid is soaked all the time, drops fall onto the medium, and there's a musty smell: that's when you need more ventilation and less saturation.
How do I prevent rot during germination?
Use an airy medium, moisten it and let it drain. Keep the temperature stable and ventilate daily. Most rotting comes from waterlogging and not renewing the air.
What do I do if mold has already appeared?
Carefully remove the affected surface layer if possible, improve aeration and reduce excess moisture. Check watering and avoid spraying directly onto the medium. If the problem repeats, it's usually due to too much saturation and too little ventilation.