When you have cuttings that don't root, there is almost always a visible clue on the stem, leaves, or propagation medium. In this guide, you will learn to identify the problem by symptoms (without guessing) and apply quick fixes to save the batch and improve your success rate next time.
Why a cutting “stops” and doesn’t grow roots
Rooting is a delicate balance: the cutting needs high humidity to avoid dehydration, but also oxygen at the base to produce roots. If something breaks that balance, the clone survives a few days “living off reserves,” but doesn’t develop new roots.
- Dehydration due to insufficient humidity, excessive ventilation, or light that is too intense.
- Root asphyxia due to excess water, compacted medium, or lack of aeration.
- Temperature out of range (cold in the stem area or heat that triggers fungi).
- Poor hygiene (dirty tools, reused trays without disinfecting, pathogens).
- Salt stress (“loaded” substrate, poorly adjusted pH, hard water, or early fertilizing).
If you want to review the process from scratch, this article from the store will help: how to make cuttings step by step.
Express checklist in 5 minutes (before touching anything)
Do this quick review. It saves you from changing ten things at once and not knowing what worked.
| What you check | What should happen | If it doesn't happen | Quick fix |
|---|---|---|---|
| Stem (1-2 cm above the cut) | Firm, light green, odorless | Soft, dark, rotten smell | Trim to healthy tissue, disinfect, reduce stagnant humidity |
| Leaves | Turgid, no extreme “drooping” | Drooping, curled or dry | Increase humidity, lower light, trim large leaf |
| Medium (Jiffy / rock wool / plug) | Moist, not dripping, with air | Soggy or compacted | Drain, improve drainage, don’t water by routine |
| Temperature at the base | 22-24 ºC stable | <20 ºC or sudden spikes | Gentle heat with mat and control, insulate from cold floor |
| Humidity in propagator | High at the start, with gradual ventilation | Permanent condensation, mold | Open vents, ventilate daily, remove dead leaves |
To measure and correct without guessing, a reliable thermo-hygrometer saves you mistakes: Large Screen Thermo-Hygrometer.
Diagnosis by symptoms on the stem
Soft, dark stem or with bad smell
This is the most typical symptom of rot: the tissue becomes gelatinous and the cut loses integrity. It usually comes from stagnant humidity + little aeration + high temperature, or from a contaminated tray/medium.
What to do now:
- Take out the cutting and cut 0.5-1 cm above the dark area until you see firm, clear tissue.
- Disinfect tools and hands. If several are the same, assume contamination and clean the whole set.
- Reapply rooting gel (sealing) and change the medium if it smells strange.
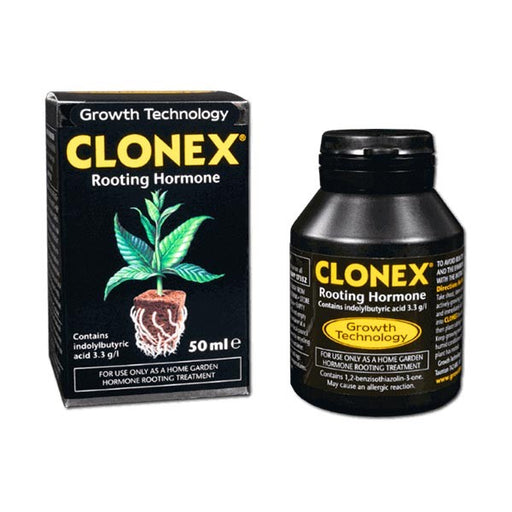
For gel, the most practical is Clonex 50ml, because it seals the cut and reduces initial dehydration. The store also has a guide to choosing a hormone: best rooting hormone for cannabis.
Dry, oxidized, or “sealed” brown cut
If the cut has dried, the cutting loses its ability to absorb. This happens if you take too long between cutting and placing in the medium, use an old gel, or leave the clone exposed to air while preparing the tray.
- Repeat the beveled cut (45º) with a clean blade.
- Apply gel immediately and place in the already prepared medium.
- Reduce light intensity for the first few days.
Crushed stem or “strangled neck”
This occurs when the hole in the plug/Jiffy is too narrow or when pressing too hard. Sap flow is reduced, the cutting declines and does not take off.
- Relocate the cutting to a wider hole or open it with a toothpick.
- Do not compact the medium around the stem: aim for contact, not pressure.
Diagnosis by symptoms on the leaves
Dropped and soft leaves (like a “rag”)
The usual: the cutting transpires more than it can replenish. It can be due to low humidity, excess direct air, heat or intense light. It also happens if the stem has an air bubble (embolism) from a poorly made cut or from leaving the stem “in the air” too long.
Quick solution:
- Increase humidity with a propagator and close vents for the first 24-48 h.
- Lower light (distance or power) and avoid direct sunlight.
- Trim 1/3 of the large leaves to reduce transpiration.
To maintain stable humidity without improvising, a propagator with adjustable ventilation works: PVC Propagator 56x31x22cm. Adjust the vents gradually to “harden” the clones.
Progressive yellowing (no spots or burns)
A mild yellowing from the first week may be normal: the cutting consumes its reserves. The problem is when it yellows quickly and growth stops: this usually indicates lack of roots + low energy due to low temperature or insufficient light, or due to a medium that is too wet and blocks oxygen.
- Check the temperature at the base (target 22-24 ºC).
- Let the medium “breathe”: water only when it starts to lighten.
- If everything is correct, use a mild stimulator, not a strong fertilizer.
To give a boost without “burning”, a specific starter for cloning like Clonex Pro Start is useful (low dose, designed for early stages).
Leaves with dry edges or burnt tips
This resembles salt stress. It appears when the medium is loaded (substrate with fertilizer, rockwool without stabilized pH, very hard water or excess spraying with concentrated products).
- If you are using rock wool, stabilize the pH first (soaking) and avoid strong solutions.
- Reduce spraying: better ambient humidity than wetting the leaves daily.
Spots, mold, or tissue that “melts”
When you see gray/white spots, fuzz, or watery areas, there is usually fungus/bacteria. Here, the mistake is not “lack of hormone,” but microclimate: too much condensation without air renewal.
- Ventilate daily (open vents or lift the lid for a few minutes).
- Remove dead leaves and clean walls with condensation.
- Avoid high temperatures with 100% humidity for days.
Diagnosis by substrate or propagation medium
Excess water: the medium is heavy and shiny
If the plug is soaked, the stem cannot breathe. It is the “silent killer” because the cutting seems to last 3-6 days... and then rots.
- Drain the tray and allow real drainage (no water accumulated at the bottom).
- Water as needed, not by schedule.
- If you use spraying, make it fine and punctual.
Lack of oxygen due to compaction
Running your finger and pressing “so it stays in place” is tempting. But rooting needs air in microspaces. In Jiffy or plugs, look for firmness without crushing.
In peat pellets, an easy option is the Jiffy7 33mm, because it maintains a fairly airy structure when well hydrated and drained.
Unprepared rock wool (high pH)
Rock wool usually comes with a high pH and must be stabilized first, otherwise the cutting gets stressed and growth slows down. The product indicates preparation: rock wool cube 4x4x4.
Salts or fertilizer too soon
Cuttings do not need strong “food” until they have roots. If the medium is highly fertilized or you add nutrients too soon, the tissue of the cut dehydrates and gets blocked.
- During the first week, prioritize humidity and stability.
- If you want to add something, make sure it is a product designed for the start and at low doses.
Environmental conditions that block rooting
Temperature: the most underestimated range
The aerial part may be fine, but if the base is cold (tray on the floor, window, winter), rooting slows down a lot. For most clones, the sweet spot is at 22-24 ºC in the stem area.
If the environment drops, a simple solution is to use a mat with control so you don't overdo it: 30W heating mat with controller. The goal is not to “heat the grow box,” but to keep the tray stable.
High humidity yes, but with gradual ventilation
The typical mistake is to have extremely high humidity without air renewal for days. At the start, you want high humidity so they don't dehydrate, but at the same time you must introduce ventilation gradually to avoid fungi and to help the cutting learn to transpire without collapsing.
With a propagator with vents you can follow a simple guideline:
- Day 1-2: vents closed, open 1-2 times a day for a few minutes.
- Day 3-5: vents at 1/4 and brief daily ventilation.
- Day 6 onwards: vents at 1/2-3/4 if you see stable turgor.
Light: soft, constant, and without “pulling down the blinds”
With too much light, cuttings transpire and wilt. With too little light, they lack the energy to create roots. Look for a moderate and stable intensity, without direct heat. If you use LEDs, avoid very short distances at first and prioritize a constant photoperiod (for example 18/6).
Quick solutions to save a batch (recommended order)
If you suspect you have cuttings that are not rooting, apply these corrections in this order. This way, you tackle first what kills quickly (rot/desiccation) and then what improves performance.
1) Redo the cut and seal it
If there are doubts about the condition of the cut (oxidation, soft tissue, or embolism), the most effective thing is to trim and reapply gel. Always use gel in a clean container (don’t put the stem “directly in the jar” if you’re working with many clones; better to use a small amount separately).
Recommended product: Clonex 50ml.
2) Change the medium or correct humidity (without waterlogging)
If the plug smells or is waterlogged, switch to a clean and well-drained one. In pressed peat, hydrate and let it drain before inserting the cutting. In rock wool, stabilize pH and drain.
Easy options to start with:
- Jiffy7 33mm for small batches.
- Rock wool 4x4x4 if you work in hydro or prefer maximum aeration.
3) Stabilize climate with a propagator
A propagator is not a “luxury”: it’s control. It allows you to maintain high humidity without over-spraying, and to ventilate wisely. If you’re currently using cups or bags, switching to a propagator usually greatly increases your success rate.
Recommendation: PVC Propagator 56x31x22cm.
4) Gentle heat at the base (when it’s cold or there are night drops)
If the temperature drops at night, rooting slows down and problems from excess water appear (because the medium dries less). Gentle, stable heat fixes both.
Recommendation: Heating mat with controller.
5) Proper foliar spraying (not haphazardly)
A specific spray can help when the cutting is dehydrating or stressed, but it doesn’t replace environmental humidity control. If you spray, do it lightly and at specific times (for example, after cutting or at the start of the day), avoiding soaking daily.
Product: Clonex Mist.
6) Gentle start when there is already a “sign” of roots
When you start to feel resistance when pulling (roots showing) or the cutting maintains turgor without a closed propagator, you can use a mild starter feed. Avoid strong base fertilizers until the root system is formed.
Product: Clonex Pro Start.
Prevention: what makes the difference in the next batch
Hygiene and work routine
- Use a clean blade/scissors and disinfect between mother plants.
- Do not reuse plugs with root remains.
- Wash the propagator and trays after each use, especially if there was rot.
Choosing the right mother material
The best cuttings usually come from healthy, vigorous shoots, without water stress and without excess nitrogen. Avoid very woody or too tender branches if you don't control the environment well. In general, a diameter similar to a fine pen works well for most growers.
Prepare the medium before cutting
Order matters: have the propagator, plugs, labels, and gel ready. This reduces the time the stem is exposed to the air. If you are working with many units, consider trays to organize the process or buy in tray/pack format.
If you are looking for all cloning materials in one place, you have the store section: products for mothers and cuttings.
Hardening: opening without collapsing
The goal is that, when there are roots, the cutting can live with “normal” humidity without falling over. To achieve this, gradually open the ventilation and observe turgidity. If they collapse when opening, close again and repeat more gradually.
Common mistakes when preparing cuttings (and how to fix them)
Many times the problem is not in the product, but in the “zero minute”. A well-cut, well-hydrated cutting placed quickly in the right medium has many more chances, even with basic equipment.
The cut is not clean (tear instead of cut)
If the scissors are dull or squeeze too much, the stem tears and the vessels are crushed. This makes absorption difficult and favors infections. The solution is simple: sharp blade or scalpel and a decisive cut. If you have already done it and the cutting is wilted, recut up to healthy tissue.
Too much leaf for the humidity you have
Leaves are “radiators”: the more leaf area, the more they transpire. If your actual humidity is not high or there is direct air, that excess leaf causes constant drooping. Trim large leaves (without leaving the cutting bare) and prioritize stable humidity inside the propagator. If your propagator condenses a lot, don't solve it by “removing leaves”: fix the ventilation.
Submerging the stem too much in the gel
With rooting gel, more is not always better. In general, it is enough to cover about 1 cm of the stem. If you submerge it too much, you can create an excessive layer that prevents exchange and drags gel into the medium, dirtying it. Apply just the right amount and, if you work with many clones, serve the gel in a separate container to keep the jar clean.
Poking the cutting and then “watering to settle”
It is a very common habit that ends in suffocation. If the medium was already well hydrated, watering right after usually soaks it and eliminates air. Better: hydrate, drain, poke, and let the medium stabilize. If you need to adjust, do it with a fine mist, not with streams.
Not labeling or keeping a minimal record
When you mix genetics or do consecutive batches, without labels it is difficult to learn from your own results. Label date, genetics, and medium used. That way, if a batch fails, you can isolate the cause much more easily (for example, “they always fail in rock wool” or “they fail when the temperature drops at night”).
Quick diagnostic table by symptoms
Use this table as a “decision tree.” Start with the most obvious symptom and apply the associated fix before changing other variables.
| Dominant symptom | Probable cause | What to check | Immediate action |
|---|---|---|---|
| Dark and soft stem | Rot due to stagnant moisture | Constant condensation, smell, soaked medium | Trim to healthy tissue, change medium, ventilate |
| Drooping leaves from day one | Dehydration / strong light | Actual humidity, direct air, distance to light | Increase humidity, lower light, trim large leaf |
| Rapid yellowing without roots | Cold at the base / lack of oxygen | Tray temperature, plug weight | Gentle heat and reduce watering |
| Spots and mold | Fungi due to lack of air renewal | Ventilation, plant debris, dripping on leaves | Ventilate more, clean, remove damaged leaves |
| Burnt tips | Salts/pH out of range | Fertilized medium, unprepared wool, hard water | Use a more neutral medium, stabilize pH, avoid fertilizers |
Frequently Asked Questions
How many days is it normal for rooting to take?
It depends on genetics and conditions. The important thing is not the exact number, but to look for signs: stable turgidity, new shoots, resistance when pulling, and visible roots in the medium.
Is it a good idea to keep the vents closed all the time?
No. At first it helps prevent dehydration, but maintaining constant condensation increases the risk of fungi. The key is gradual ventilation.
Can I use “growth” substrate for rooting?
If it is heavily fertilized, it can cause problems. For rooting, it is better to use a more neutral medium (Jiffy, plugs, stabilized rock wool) and control the water.
What should I do if fungi appear in the propagator?
Ventilate more, lower condensation, remove dead material, and clean the propagator. If the problem is widespread, change the medium and check the temperature.
Which product should I choose: gel, spray or liquid stimulator?
The gel is used at the cut and is the base. The spray helps manage foliar stress at specific times. The starter liquid is used when rooting is starting. You can read more in the store guide: rooting hormones: what they are and how to use them.